In Arduino, digitalRead() and analogRead() are used to take input. Suppose you have to add some buttons or sensor to show an event in any Arduino project. In that case you have to use digitalRead() or analogRead() function of Arduino based upon what type of input we are giving. For example if you are giving button input then digitalRead() is enough for that and if you are using some of analog sensor (such as potentiometer, temperature sensor) then we have to use analogRead(). Some sensor module comes with in-built amplifier and comparator, which gives digital output such as IR proximity sensor, PIR sensor etc.
Arduino buying links
| Amazon link for India | Amazon link for other countries |
Arduino digitalRead function
This function takes a digital input at any I/O pin. It takes pin number as parameter and returns the state of that pin number. Arduino UNO has 14 input/output pins out of which we can choose any pin as input or output. To choose any I/O pin as input, we have to just define it using pinMode() function. pinMode() function takes two parameter- pin number and pin type (either input or output).
int pushButton = 2; // digital pin 2 has a pushbutton attached to it. Give it a name
void setup() { // the setup routine runs once when you press reset
pinMode(pushButton, INPUT); // make the pushbutton’s pin an input
}
void loop(){
}
In this code we have first defined pin number 2 as pushButton then in the void setup block we have defined pushButton as input pin. Now let’s see the code using which we can read the input from this pin and print the state of pin on serial moniter.
int pushButton = 2;            // digital pin 2 has a pushbutton attached to it. Give it a name
void setup() {                  // the setup routine runs once when you press reset
  pinMode(pushButton, INPUT);   // make the pushbutton's pin an input
Serial.begin(9600);             // initialize serial communication at 9600 bits per second
}
void loop() {                   // the loop routine runs over and over again forever
  int buttonState = digitalRead(pushButton);    // read the input pin
  Serial.println(buttonState);                  // print out the state of the button
  delay(50);        // delay in between reads for stability
}
In this code we have initialized the serial communication at 9600 baud rate in void setup block. In void loop block we have in stored the state of that pin in a integer type variable called buttonState. Then we have printed the button state on serial moniter. This printing will repeat every 50 millisecond since we have given 50 millisecond delay in the code. Let’s see the output of this code.
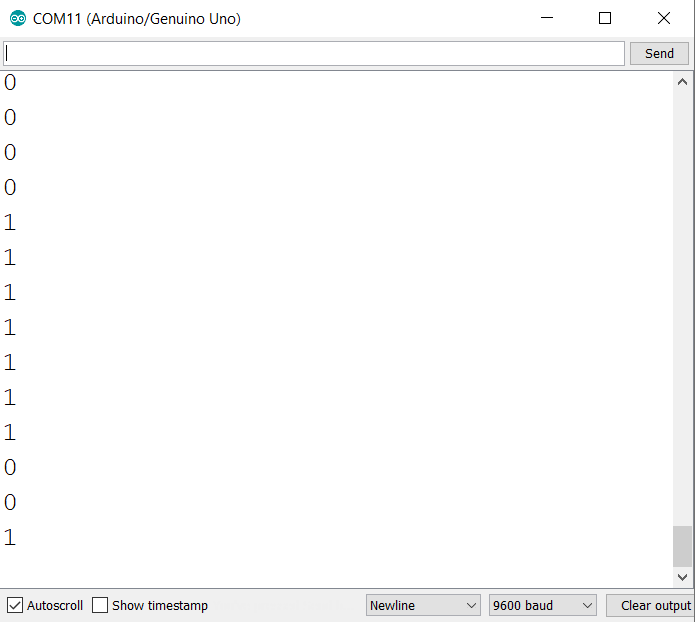
This is how output of that code will look like. It give ‘1’ or ‘0’ as output.
Arduino analogRead function
Arduino Uno has 6 analog in pin which can take analog voltages as input. Interesting thing is that we don’t have to define that we are giving any analog pin input. Because these pins are particularly for taking analog input. Analog input pins are connected to a 10 bit ADC, which are present in ATMEGA328P. These ADC gives 10 bit binary number according to voltage that we have applied to its analog pin. 10 bit means it can have 210 = 1024 different values to define the voltage we have applied with respect to a reference voltage. By default reference voltage is 5 volt in Arduino UNO. If we go by default then 0 will represent 0 volt and 1023 (11 1111 1111) will represent 5 volt. That means it can detect 4.9mV (~5mV) change in input voltage. We can change the reference voltage using “AREF” pin available on Arduino board. We have to just give the voltage on this pin. That voltage will to be new reference voltage. Now let’s see how we can read analog input.
void setup() {                   // the setup routine runs once when you press reset
Serial.begin(9600);             // initialize serial communication at 9600 baud rate
}
void loop() {                   // the loop routine runs over and over again forever
  int sensorValue = analogRead(A0);     // read the input on analog pin 0
 Serial.println(sensorValue);   // print out the value you read
  delay(50);        // delay in between reads for stability
}
Here we have just initiated serial communication in void setup block. In the void loop block we have first assigned the analog read in an integer type local variable called sensorValue. Then we printed the sensorValue serially. Let’s see the output of this code in the serial monitor and serial plotter.
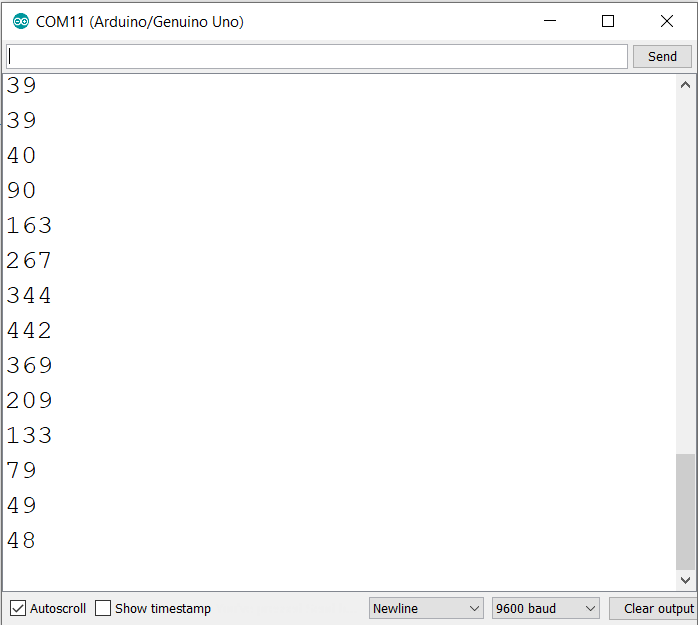
This is the analog value on serial monitor. In serial monitor value will be shown as numbers.
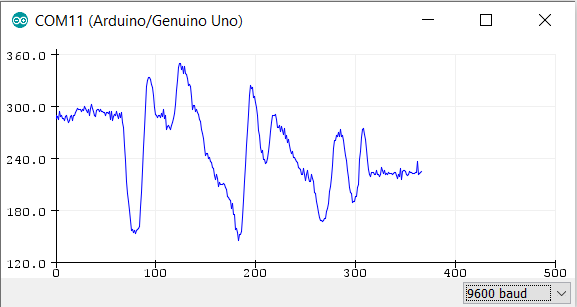
This is the value analog value on serial plotter. It will plot the analogue value as graphical form. It is very convenient to use serial plotter when we are working with some sensor where we want to see the increment or decrement in the sensor value graphically.
Read analog voltage in Arduino
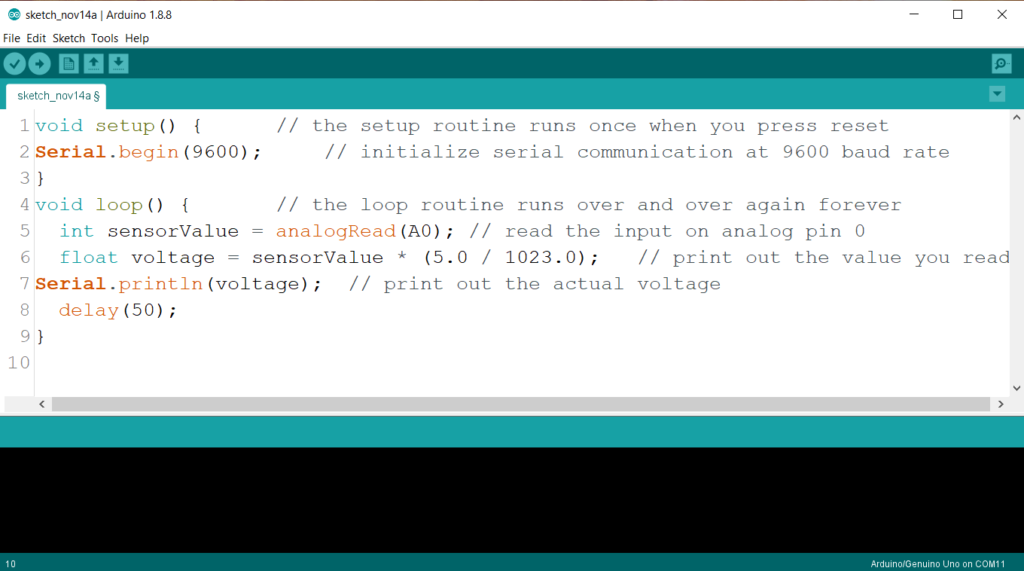
If you are working with analogRead in Arduino then you wouldn’t want to see that analog value from 0 to 1023. Instead you would want to see the actual voltage applied on the analog pin. Then you have to do some calculation to find the voltage using analog value. In the case of you are using default 5 volt reference then you have to multiply the analog value to the 5 volt and divide it by 1023 to get actual voltage. You wouldn’t want to do it yourself when Arduino can do this calculations very easily. Let’s see how?
void setup() {                      // the setup routine runs once when you press reset
Serial.begin(9600);             // initialize serial communication at 9600 baud rate
}
void loop() {                   // the loop routine runs over and over again forever
  int sensorValue = analogRead(A0);     // read the input on analog pin 0
  float voltage = sensorValue * (5.0 / 1023.0);   // print out the value you read
Serial.println(voltage);        // print out the actual voltage
  delay(50);
}
Here we have declared a float type variable “voltage”. This float variable can store double precision floating point numbers. In this variable we have stored the calculated voltage with decimal point. And then serial printed it. Here is the output of this code in serial monitor and plotter.
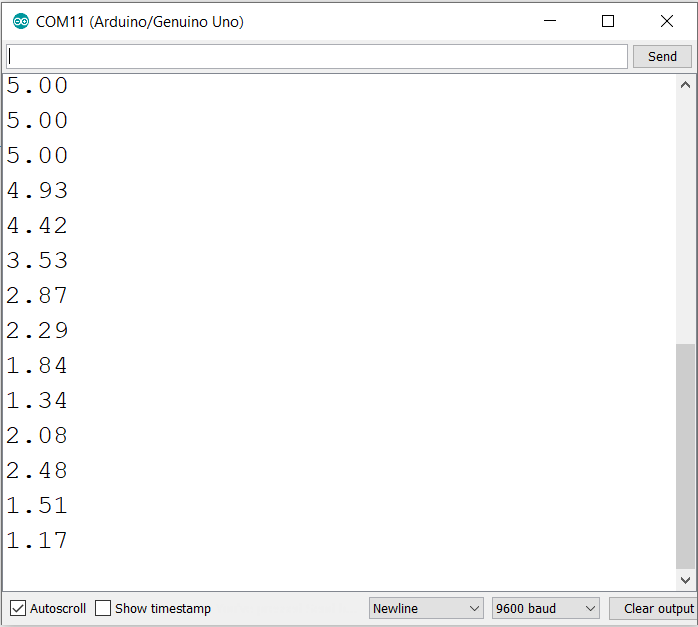
Now serial monitor is showing the voltage on the analog in A0.

This is the graphical representation of the analog voltage on A0. Suppose we are using a temperature sensor which changes voltage according to temperature. So, we can calculate temperature out of sensor value and can see it on serial plotter grahically. Serial plotter is self adjustable and it has one drawback which is when screen is full with plot then it starts scrolling. This is obviously not the problem but when it starts scrolling then it erases previous data. That means we can’t scroll and see previous data.