goto and return are very important control structure in Arduino. These control structures helps us a lot in the program flow and management.
Buy Arduino
| Amazon link (for India) | Amazon link (for other countries) |
goto statement in Arduino
goto statement transfers program flow to a labeled point in the code. It can be used to create infinite loops but it is not efficient. We can go to any part of code if a certain condition is met. Let’s see the syntax of the goto statement.
Label:
goto Label;
Now let’s see a code for goto statement.
int a = 0;
void setup() {          // put your setup code here, to run once:
  Serial.begin(9600);
label:                  //label for return to this line of code
  a++;
  Serial.println(a);
  if (a<20)
  {
    goto label;         // returning to label
  }
}
void loop() {
  // put your main code here, to run repeatedly:
}
Output:
Here we have defined an integer type variable ‘a’ and initialize it with 0. Then we initialize the serial communication at 9600 baud rate. And then we have labeled the program address with “label” token to return to this address using goto statement. Then we incremented the ‘a’ and serial printed it. Then we are returning to the “label” until ‘a’ is not equal to 20.
So numbers from 1 to 20 will be displayed on the serial monitor.
But use of goto statement is discouraged in C programming language. Some authors of C programming books claims that goto statement is not the necessary in C language. We can design the any program without using the goto statement. But it will be very hard to debug.
We generally use the goto statement in deeply nested for loops or with if block to perform any jump operation on a certain condition.
We will see a program where we will enter a number using serial monitor and table of that number is printed on the serial monitor. Let’s see the screenshot of that program serial monitor.
As you can see that this program has asked for a number to print its table. As soon as number is entered Arduino has printed its table on serial monitor. Now let’s see the code for this program.
int number;                           // to store the number that we will enter on serial monitor
int i = 1;                            // to iterate from 1 to 10 to create table
void setup() {
  Serial.begin(9600);                 // initialize the serial communication
}

void loop() {
  Serial.print("Enter the number whose table you want to print: "); // printing the message to enter a number
  while (1) {                         // infinite loop to hold the code here and keep checking serial data
    if (Serial.available() > 0) {     // checking if any serial data is available
      number = Serial.parseInt();     // storing the integer value available on serial monitor to number
      goto BreakLoop;                 // to jump out of infinite while loop
    }
  }
BreakLoop:
  Serial.println(number);
table:
  Serial.print(number);               // printing table format
  Serial.print(" x ");
  Serial.print(i);
  Serial.print(" = ");
  Serial.println(number * i);
  i++;                                // incrementing i till 10
  if (i <= 10) {
    goto table;                       // jump to table label till i is 10 to create table
  }
  i = 1;                              // resetting i to print the table next time
  Serial.read();                      // to clear the serial buffer
}
Here we have declared two integer type variables number and i. number variable is used to store the number which we will enter through the serial monitor. “i” is used to iterate from 1 to 10 to multiply with that number to create table.
In the void setup function we have initialized the serial communication. In the void loop function first we have printed the message to enter the number. Then we have started a infinite loop to hold the code there and keep checking if any number is registered on serial monitor.
Next section of our code will not run until we don’t enter any number. As soon as we enter any number on serial monitor if condition is true and that number will be stored in the number variable. Then code will jump out of while loop.
Then we are printing the format for the table using 5 serial printing command since we can’t cover it using one printing command as c programming. We are incrementing to find next multiple of table. Then we are checking if i is less or equal to 10 or not. If not then we are jumping the code to print the next multiple of the table.
This way we can print the table of entered number using goto function.
Return statement
The return statement terminates a function and returns a value. Value can be any variable or constant. We can use only return statement without passing it the value. It will just terminate the function.
Let’s see the syntax of the return function –
return;
return value;
Value can be any variable or constant type.
Return function is very useful in testing a section of code without having to “comment out” large sections of possibly buggy code.
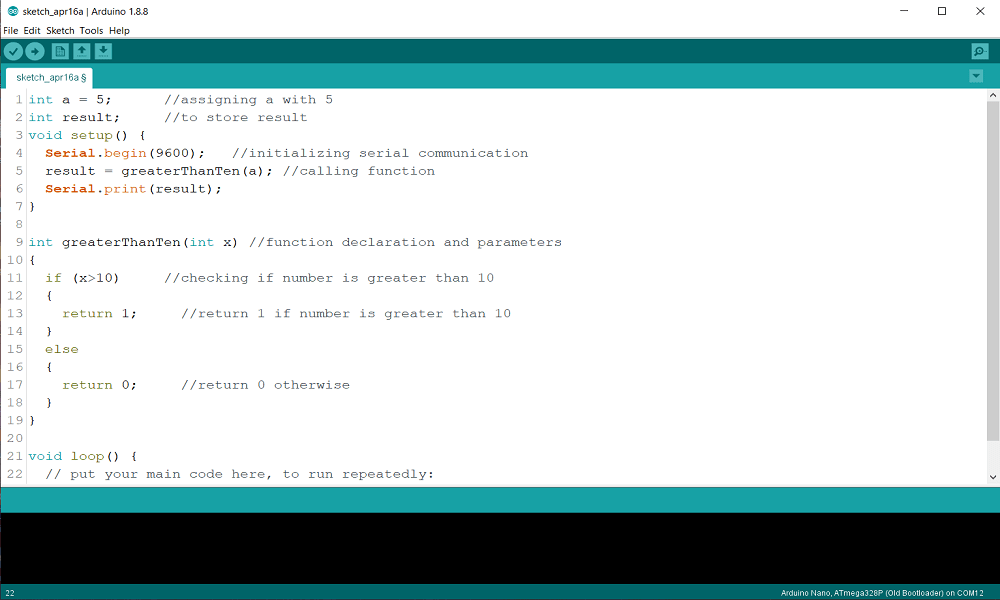
Let’s see an example code to understand return function well.
int a = 5;                 //assigning a with 5
int result;                     //to store result
void setup() {
  Serial.begin(9600);           //initializing serial communication
  result = greaterThanTen(a);   //calling function
  Serial.print(result);
}

int greaterThanTen(int x)       //function declaration and parameters
{
  if (x>10)                  //checking if number is greater than 10
  {
    return 1;                   //return 1 if number is greater than 10
  }
  else
  {
    return 0;                   //return 0 otherwise
  }
}

void loop() {
  // put your main code here, to run repeatedly:
}
Output: 0
Here we have assigned 5 to an integer type variable ‘a’. We declared another integer type variable ‘result’ to store the result which function will return. Then serial communication is initialized. Then we called the function which we have declared called “greaterThanTen”. In this function we have checked if number is greater than 10 or not. If number is greater than 10 then function will return 1 otherwise it will return 0. ‘a’ is not greater than 10 so function will return 0 which will printed on serial monitor.
Now let’s see the how we can test the code using return function.
void setup() {
  Serial.begin(9600);
  Serial.println("hello world!");
  return;
  Serial.print("hello world!");
}
void loop() {
  // put your main code here, to run repeatedly:
}
Output: hello World!
As you can see that we have printed hello world! two times in the setup block but it is printed only once. The reason behind it is that we have given return command between them. So only code above return statement will run.
What entertaining message
Hello my friend! I wish to say that this article is awesome,
great written and come with almost all vital infos.
I’d like to peer more posts like this .